
Makeup Hacks For Mature Skin
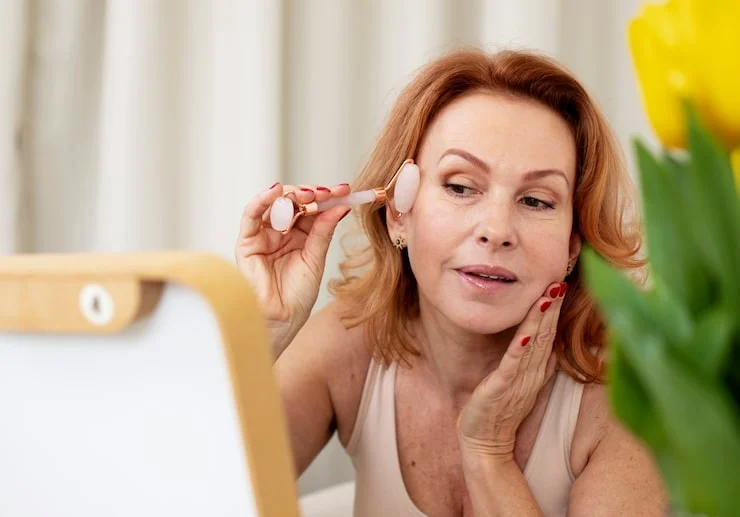
Most makeup advice for mature skin misses the point. It tells you to "hydrate" and "use cream products" without explaining why your foundation suddenly looks wrong, why concealer settles into lines you did not know you had, or why the blush technique that worked at thirty-five now makes you look tired. The truth is simpler and more useful: your skin changed, and your makeup needs to change with it. This guide walks through what actually happens to mature skin, which habits to drop, and which small adjustments make the biggest difference. No complicated routines. No twelve-step processes. Just practical changes backed by what makeup artists who work with mature skin say over and makeup hacks for mature skin.
Why Your Old Makeup Routine Stopped Working?
Mature skin is not just "older skin." It behaves differently. Oil production drops, which means makeup clings to dry patches instead of gliding over them. Skin thins, making texture and fine lines more visible under heavy products. Water retention becomes less efficient, so skin looks and feels dehydrated even when you drink enough water .
These changes explain a frustrating pattern. The full-coverage foundation you loved at forty starts looking cakey by fifty. The powder you used to set your t-zone now turns every expression line into a visible crack. The concealer that once brightened your under-eyes now settles into creases within an hour.
Makeup artist Lauren D'Amelio Ventre explained the mechanics plainly: every wrinkle is essentially a small valley, and the thicker the layer of makeup, the more product migrates into that crease as your face moves throughout the day . This is not a product failure. It is physics. Thinner layers consistently outperform thick ones, even when the coverage level is identical.
The goal, then, is not to cover more. It is to place less product in more strategic spots and to choose formulas that work with your skin's current behavior rather than against it.
Read Also: Makeup Hacks To Prevent Cakey Makeup For Dry Skin
Start With Skin, Not Makeup
Every makeup artist interviewed across beauty publications says some version of the same thing: prep matters more than product. Charlotte Tilbury put it memorably when she said you cannot have a beautiful painting without a beautiful canvas . For mature skin, that canvas needs moisture, not primer alone.
The temptation to skip moisturizer because you worry about shine is a mistake. Dry skin clings to pigment, which leads to patchiness, cracking, and a dull finish . Apply a moisturizer suited to your skin type and give it a minute or two to absorb before anything else touches your face . If your skin is on the drier side, a serum underneath helps. If it leans oily, an oil-free gel moisturizer gives your foundation something to grip without adding excess slip .
Primer is worth using, but choose it with intention. A hydrating primer on cheeks and the under-eye area helps smooth dehydration lines. A blurring primer pressed lightly into pores and smile lines softens texture without adding weight . Laura Geller called primer non-negotiable for mature skin because it smooths texture and helps everything you apply afterward stay in place .
One warning: do not pile on too many skincare layers before makeup. Excess product can cause foundation to slip, pill, or separate . Moisturizer, maybe a serum, and sunscreen are enough. Let each layer settle before adding the next.
Foundation: Less Product, Better Placement
The single most common foundation mistake on mature skin is applying an even layer across the entire face. Makeup artist Christian Briceno told Glamour that mature skin looks fresher when coverage is focused on the center of the face rather than the perimeter . The outer jaw and the area around the crow's-feet are where product tends to settle and draw attention to texture. Skip them unless you genuinely need coverage there.
Formula matters as much as placement. Heavy, matte foundations are drying and grab onto texture . Look instead for light-to-medium buildable coverage with a satin or radiant-natural finish. High water content helps the formula sink into thinner surface skin without cracking. Ingredients like hyaluronic acid, ceramides, and peptides support hydration through the day .
Application technique makes a visible difference. Use a damp sponge and press the product into your skin rather than dragging it across the surface. Briceno's tip is to press, not drag, because pressing pushes pigment into texture and lifts off excess product at the same time . If you prefer a brush, use light strokes and then go over the face with a damp sponge to remove anything sitting on top.
The "less is more" rule is not a cliché here. It is the difference between a finish that looks like skin and one that looks like a mask.
Concealer: Correct the Shadow, Do Not Cover the Area
Under-eye concealer is where many mature makeup routines go wrong. The instinct is to apply more product to hide dark circles. The result is often the opposite of what you wanted: creasing, texture, and a tired appearance that looks worse than bare skin.
Rose-Marie Swift's advice cuts through the confusion: correct, do not cover . Dark circles are shadows, not discoloration to be painted over. A peach or pink corrector applied to the hollows under the eyes cancels the shadow before you add anything skin-toned on top . Makeup artist Erica Taylor calls this a "DIY filler" effect because it lifts the area without adding heavy product .
When you do apply concealer, use a creamy formula rather than a thin one. Creamy textures last and give solid coverage without requiring multiple layers . Press the product in gently with your ring finger. Never rub. And apply concealer before foundation, not after, so the foundation can blend the edges seamlessly .
If your under-eye area still looks creased after application, the problem is likely the amount of product, not the formula. Start with less than you think you need. You can always add a tiny bit more. Removing excess is much harder than preventing it.
Powder: Use It Sparingly, and Only Where You Need It
Powder has a bad reputation in mature makeup circles, and for good reason. A heavy dusting across the whole face turns dry skin into a flat, textured surface that amplifies every line. But abandoning powder entirely is not always practical, especially if you have oily areas or live in humidity.
The solution is targeted application. Use a small fluffy brush and press a finely milled powder only into areas that genuinely need it: the t-zone, the sides of the nose, maybe the chin. Avoid the under-eyes and the areas around the mouth where expression lines live .
The technique of pressing rather than sweeping matters. Pressing anchors the cream products underneath and creates longevity. Sweeping coats the surface and can disturb the layers below . If you have dry skin, you may be able to skip powder entirely on most days. If you have combination skin, focus on the center of the face and leave the cheeks and jaw alone.
Blush: Placement Changes Everything
Blush is one of the most powerful tools for making mature skin look alive, but the placement that worked in your twenties and thirties may now be dragging your face downward. As cheek volume changes with age, blush applied low on the cheek can emphasize hollowness rather than lift it.
Sandy Linter's approach is to apply blush to the highest point of the cheekbone and then blend across the entire cheekbone in a circular motion. She favors soft, natural-toned shades with a slight shine, because the subtle luminosity helps create the illusion of fullness . The goal is not a stripe of color but a wash that brings warmth and light back to the face.
Cream and gel blushes are particularly forgiving on mature skin because they blend into the skin rather than sitting on top of it. They deliver diffused color that looks like it is coming from within . If you prefer powder, choose a finely milled formula and use a light hand.
For an extra lift, Taylor's "pink corrector facelift" trick is worth trying. Take a pink or peach corrector and tuck it into the hollows under the eyes, the marionette lines, and softly under the cheekbones. Blend with a damp sponge. The goal is to cancel shadows and bring light to areas that tend to sink and drag the face down.
You May Also Like: Easy Makeup Hacks for Everyday Use
Eyes and Brows: Definition Without Harshness

Mature eyelids often become more hooded or textured, which makes heavy eyeliner and shimmery shadows less flattering than they once were. A soft pencil liner smudged along the lash line gives definition without the severity of a sharp liquid line . Cream eyeshadows in neutral tones glide over texture and dry down without creasing into fine lines .
Brows thin with age, and filling them in is one of the quickest ways to frame the face and look more polished. A fine-tipped brow pencil that creates hair-like strokes looks more natural than a powder or gel that coats the whole brow . Choose a shade close to your natural hair color, or a soft gray if your brows have turned gray, and fill only the sparse areas rather than redrawing the entire brow.
Mascara can be tricky if lashes have become sparser or if hooded lids make them hard to reach. A tubing mascara that wraps lashes in tiny tubes rather than painting them with pigment tends to smudge less and removes easily with warm water . A skinny brush helps reach the root of the lash and catches even the smallest hairs .
Lips: Hydration Before Color
Matte lipsticks are rarely kind to mature lips. They emphasize vertical lines and can make lips look smaller and drier than they are. Satin, creamy, or sheer formulas keep lips comfortable and blur the look of fine lines .
A lip liner can help define the shape without looking drawn-on. Choose a shade that matches your natural lip color rather than a dramatic contrast, and blend the liner inward before applying lipstick or balm. If your lips feel dry, apply a hydrating balm first and let it absorb for a minute before adding color.
What to Skip Entirely?
Some habits are not worth salvaging. Heavy contouring looks harsh on thinner skin and rarely mimics natural shadow the way it does on fuller faces. Baking, the technique of packing loose powder under the eyes and letting it sit, is especially aging on delicate under-eye skin . Full-matte formulas of any kind tend to dry out mature skin and grab makeup hacks for mature skin .
The most important thing to skip, though, is the mindset that makeup is for erasing signs of age. Makeup artist Lauren D'Amelio Ventre told Glamour that she does not make makeup decisions based on age but on skin behavior . That distinction matters. You are not trying to look twenty-five. You are trying to look like yourself, comfortable and confident, with makeup that works with your skin instead of fighting it.
A Simple Routine That Covers the Essentials
If you want a practical takeaway, here is what the experts' advice looks like in sequence:
- Prep: Moisturizer suited to your skin type. Let it absorb. Add a hydrating primer if you want extra smoothing.
- Base: A light-to-medium foundation or tinted moisturizer applied only where you need it, pressed in with a damp sponge.
- Correct: Peach or pink corrector under the eyes, then a small amount of creamy concealer pressed in with a finger.
- Color: Cream blush on the high cheekbone, blended in a circular motion. A soft pencil liner smudged along the lash line. A neutral cream shadow if you want it. Brow pencil in sparse areas. Tubing mascara.
- Set: A tiny amount of finely milled powder pressed into the t-zone only. Skip the under-eyes.
- Lips: A creamy or satin lipstick, or a tinted balm. Lip liner if you want definition.
- The whole routine takes five minutes. It uses fewer products than the average full-face routine. And it is designed to let your skin look like skin, which is the only standard that matters.