Makeup Hacks For Hooded Eyes Beginners

Have you ever spent time putting on eye makeup, only to open your eyes and see nothing there? The eyeshadow you worked so hard on just vanishes. The eyeliner you drew so carefully smudges or gets covered by a fold of skin. If this sounds familiar, you likely have makeup hacks for hooded eyes beginners.
This is a very common eye shape. Many people have it. Some are born with it. Others develop it as they get older and their skin changes . The good news is that you don't have to give up on beautiful eye makeup. You just need to learn a few simple tricks that work with your eye shape, not against it.
This guide is for complete beginners. It uses no fancy words. It gives you clear, step-by-step instructions. We will talk about what hooded eyes are, how to prepare your eyelids, how to pick the right tools, and how to put on eyeshadow and eyeliner so that they actually show up and last all day.
What Are Hooded Eyes?

First, let's understand what we are working with. Hooded eyes have an extra layer of skin that folds down from the brow bone. This fold covers the natural crease of your eyelid. It might even cover most of your eyelid when your eyes are open .
Think of it like a curtain. The curtain hangs down and hides the stage (your eyelid) behind it. Because of this, a lot of eyeshadow applied to the lid simply gets hidden when you open your eyes . Another problem is that your eyelid skin touches the skin under your brow bone. This contact can cause your makeup to smudge and transfer .
You can check if you have hooded eyes easily. Look straight ahead into a mirror. If you cannot see much of your eyelid, or if the crease is not visible, you have hooded eyes . There is no need to stretch your skin or raise your eyebrows to check. You want to see how your eyes look when they are resting.
Read Also: Makeup Hacks To Make Foundation Last Longer
Preparing Your Eyelids
This is the most important step. If you skip it, your makeup might crease, smudge, or disappear quickly. Hooded eyes are oily for many people. The skin also rubs together more. A good base is non-negotiable.
Clean Your Eyelids
Start with clean skin. Use a gentle cleanser or micellar water on a cotton pad. Wipe your eyelids to remove any dirt, oil, or old makeup . This step helps everything else stick better.
Apply an Eyeshadow Primer
Primer is your best friend. This is a product that goes on before your eyeshadow. It creates a smooth surface for the shadow to grab onto . It also controls oil and prevents creasing.
Do not skip the primer. It is a small step that makes a huge difference . If you have very oily lids, some makeup artists suggest putting a little bit of translucent powder over the primer before you add eyeshadow. This helps with blending .
Set the Base
After your primer, take a light matte eyeshadow or a setting powder. Dust it lightly over the entire primed area, from your lashes to your brow bone . This step locks the primer in place and makes the eyeshadow colors you apply later blend more easily .
Pick the Right Tools
Having the right brushes helps a lot. You do not need a hundred different ones. A few good ones will work.
-
Fluffy Blending Brush: This brush is soft and has a round shape. It is used to put color in your crease and blend it out. A fluffy brush prevents harsh lines .
-
Smaller Tapered Brush: This brush is more pointed. It is perfect for more precise work. You can use it to define the outer corner of your eye .
-
Pencil Brush: This is a small, firm brush. It is great for smudging eyeliner or putting eyeshadow on your lower lash line .
The "New" Crease
This is the biggest secret for hooded eyes. Since your natural crease is hidden, you need to make a new one. This new crease should be higher up, where it can be seen when your eyes are open .
Look straight ahead into a mirror. Keep your eyes open and relaxed. Feel the bone at the top of your eye socket, right below your eyebrow. This is your orbital bone. You will put your "new" crease right on or just above this bone .
Take your fluffy blending brush and a matte brown eyeshadow. This color should be a few shades darker than your skin tone. Lightly sketch a line following this higher placement. Then, blend the color upward and outward toward the end of your eyebrow . This simple trick creates depth and lifts the eye.
Put on Your Eyeshadow
Now you can build the full look. Use the same "new crease" idea for all the colors.
First, put a light matte eyeshadow on your eyelid. This brightens the area. Bring this light color all the way to your brow bone. This helps the darker shades blend better .
Next, take your transition shade. This is a medium-toned color. Apply it into the "new crease" you just made. Use a windshield wiper motion, moving the brush from side to side . Blend it up and out. You should see this color even when your eyes are open.
Now, take a darker shade. This will add depth. Place this color on the outer corner of your eye. Make a small "V" shape . Blend it inward, but only about halfway. The darkest part should be at the very outer edge. This creates the makeup hacks for hooded eyes beginners.
Where to Put Shimmer
Many people love a bit of sparkle. But shimmer can be tricky on hooded eyes. Putting shimmer on the hooded part (the skin that folds over) can make the hood look bigger .
The rule is simple: place shimmer only on the center of your mobile eyelid. This is the part that moves when you blink. Also, put it in the inner corner of your eye . This placement draws light to the center and makes your eyes look bigger and more awake. You can apply shimmer with your finger. Press it on gently. This gives a better color payoff than a brush .
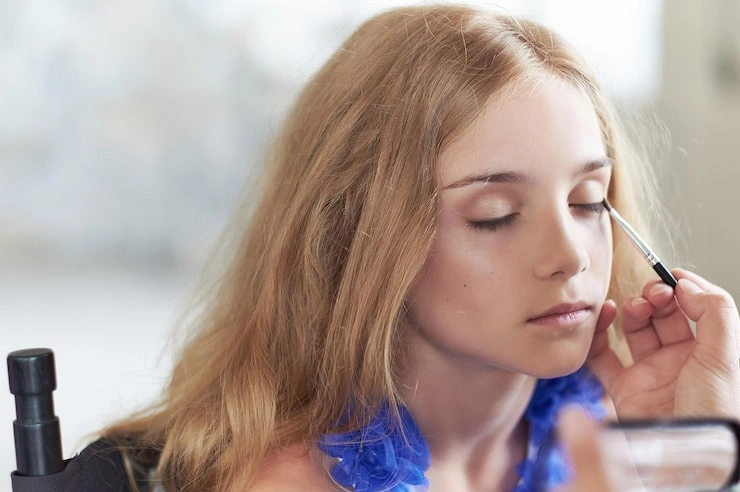
Eyeliner Techniques for Hooded Eyes
Eyeliner is often the hardest part. A thick line will take up all your lid space and disappear . Here is how to do it right.
Tightlining
This is the best trick. Tightlining means putting eyeliner in your upper waterline. The waterline is the skin right under your eyelashes. To do this, gently lift your upper eyelid. Use a waterproof pencil or gel liner to fill in the space between your lashes . This defines your eyes and makes your lashes look thicker. It does not take up any visible lid space.
The Straight Wing Trick
Creating a winged liner can be hard. The hood of skin often gets in the way. The trick is to draw the wing with your eyes open .
Look straight ahead. Draw the wing's tail first. Extend it from your lower lash line's angle . Then, connect it to your upper lash line with a thin, straight line. You might have to draw over the skin fold. Do not worry if the line looks a bit odd when your eyes are closed. It will look perfect when you open them .
Keep the line very thin. Only put liner on the outer half of your eye if you want it to be visible. A thick line will just hide the little lid space you have .
The Best Products
Use a long-wearing, waterproof eyeliner. This prevents smudging and transfer . Gel liners and felt-tip pen liners are both good choices. They offer precision.
Mascara and Lashes
Mascara is a simple way to make a big difference. It opens up the eyes. Always curl your eyelashes first . This gives an instant lift. Use a lash curler before you apply mascara.
Choose a good mascara. A tubing mascara is a great option for hooded eyes. This type of mascara forms little "tubes" around each lash. It is smudge-proof and does not flake . Waterproof mascara is also a good choice.
If you use false lashes, pick styles that are shorter at the inner corner and get longer at the outer corner . Wispy lashes are also good. They add length without making the eye feel heavy..
You May Also Like: Easy Makeup Hacks for Everyday Use
A Quick Routine for Beginners
If you are new to this, start simple. Here is a five-minute routine.
First, clean and prime your eyelid. Next, apply a light matte shadow all over the lid. Then, take a medium brown shadow. Put it above your natural crease. Blend it up and out. This is your new crease. Now, tightline your upper waterline with a dark pencil. Finally, curl your lashes and apply mascara .
This simple routine will make a noticeable difference. It takes practice. Do not give up. You will get better each time.
Mistakes to Avoid
Learning what not to do is just as important.
- Avoid putting dark eyeshadow in your natural crease. It will disappear. Place it higher .
- Do not use thick eyeliner. It covers the lid. Keep it thin .
- Do not put shimmer on the hood of your eye. It makes it look bigger .
- Finally, do not blend your eyeshadow downward. Always blend up and out. This lifts the eye .
With these tips, you can stop fighting your eye shape. You can start highlighting your natural beauty. Good luck, and have fun with your makeup!